Table of contents
Intro
In this article, you’re going to learn how to monitor multiple Lightsail instances at once in a single Grafana dashboard.
You can check the article regarding a single instance, Monitor a Lightsail instance using Prometheus and Grafana if you want to get familiar with the process. Most of the steps will be explained here again.
By default, you can monitor the Lightsail instance from the AWS account, but this will require you to log into AWS and get on the Lightsail services section to check each instance in particular. That is kind of annoying and it’s hard to get a good overview.
That’s where the Grafana dashboards come into play.
The flow is like this:
- We’ll install Node Exporter on all the Lightsail instances that you want to monitor
- Install Prometheus on a separate machine and set all the other Lightsail instances as targets
- Grafana will read the Prometheus info as the data source and put it into a Dashboard.
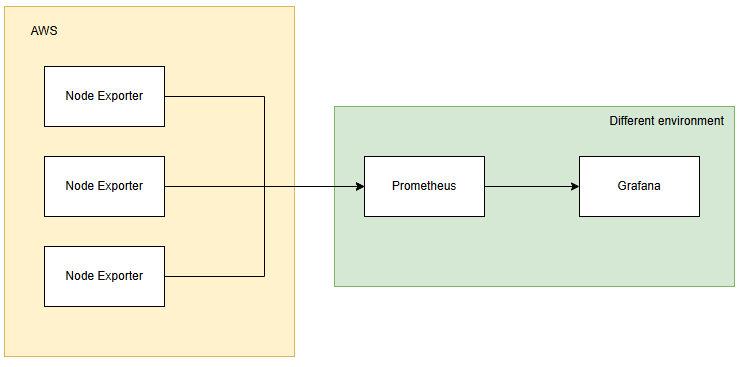
In this setup, we have multiple Lightsail instances monitored in a single Grafana dashboard.
This would be a regular setup if have your application running behind a load balancer.
As showcased above, the Node Exporter will run on each of the Ligthsail instances we want to monitor, while Prometheus and Grafana will run on a different machine.
For a single Lightsail instance, check the Monitor a Lightsail instance using Prometheus and Grafana.
Requirements
- Multiple Lightsail instances that use Ubuntu 20.04
- Static IP attached to each instance
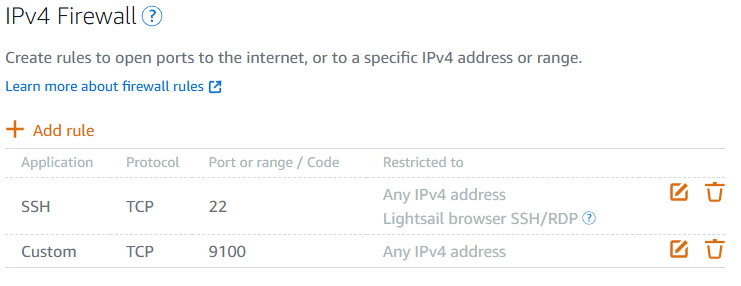
- Port 9100 opened on the instances
Lightsail > Instance > Networking
9100 is used by Node Exporter. - A different instance/server/machine that will host Prometheus and Grafana
- Port 9090 opened on this separate instance
9090 is used by Prometheus
Install Node Exporter
1. Connect to your Lightsail instance using SSH
2. Create an account named exporter for Node Exporter
sudo useradd --no-create-home --shell /bin/false exporter
3. Download the node_exporter binary package to your instance
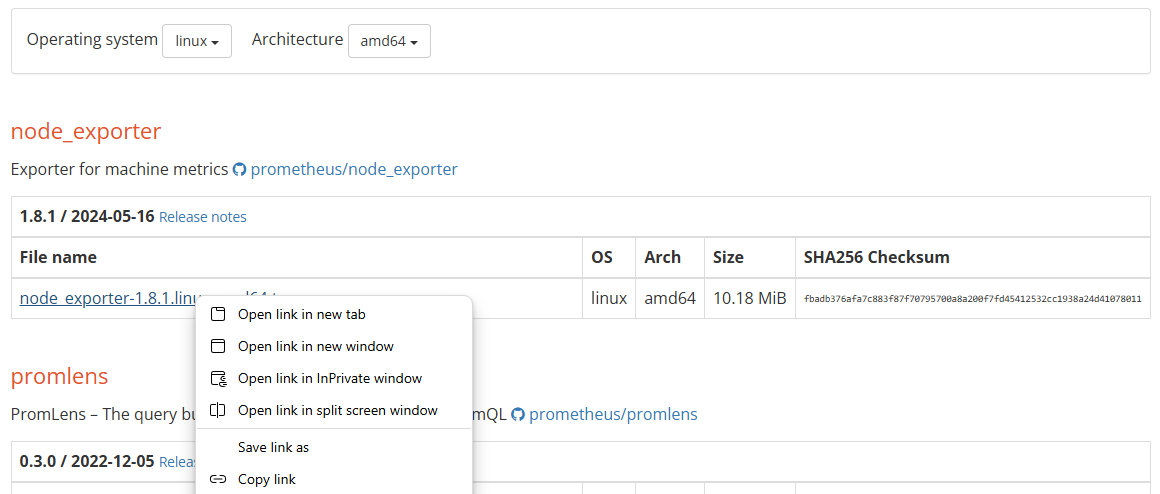
- Go to Prometheus download page
Select the operating system to be linux and architecture amd64.
Right-click on node_exporter latest version, “Copy link” and save it in the notepad for later.
4. Connect via SSH to your Lightsail instance again
5. Go to home
cd ~
6. Download the node_exporter binary package to your instance
curl -LO node_exporter_url_address_you_saved_in_notepad
Example:
curl -LO https://github.com/prometheus/node_exporter/releases/download/v1.8.1/node_exporter-1.8.1.linux-amd64.tar.gz
7. Extract the contents for the downloaded packages for Node Exporter
Make sure the archive names match the ones in the links you copied in step 6.
tar -xvf node_exporter-1.8.1.linux-amd64.tar.gz
8. Copy the node_exporter file from ./node_exporter* to /usr/local/bin
sudo cp -p ./node_exporter-1.8.1.linux-amd64/node_exporter /usr/local/bin
9. Change ownership of the file to the exporter user
sudo chown exporter:exporter /usr/local/bin/node_exporter
Configure Node Exporter
1. Connect via SSH to your Lightsail instance again
2. Create a file that will hold the basic_auth for Node Exporter
First, create a folder for the file in /etc/
sudo mkdir /etc/node_exporter
Quickly edit with Vim:
- Press i to enter insert mode and make changes to the file
- Press ESC to exit insert mode
- Press : to enter command mode and add wq! to save the file
Here are some more essential commands for Vim.
Create and edit the file
sudo vim /etc/node_exporter/web.yml
Add the following text to the file and save it.
basic_auth_users:
  node_exporter_uberadmin: $2a$12$GxinAvcHwkGQclBiJmz6ce5is67Bxj7mvnKyY4L0DxJooqFgA7hvu
Note: the password needs to be generated using a bcrypt hash of the string you want to use.
Use an online bcrypt tool for that if it’s easier.
The example above is the hash for password123.
3. Save the file
Press the Esc key to exit insert mode, and type :wq! to save your changes and quit Vim.
4. Create a systemd service for node_exporter in Vim
sudo vim /etc/systemd/system/node_exporter.service
5. Press the i key to enter insert mode in Vim
6. Edit the file as follows to collect all the available data from the server
[Unit]
Description=NodeExporter
Wants=network-online.target
After=network-online.target


[Service]
User=exporter
Group=exporter
Type=simple
ExecStart=/usr/local/bin/node_exporter \
--web.config.file="/etc/node_exporter/web.yml"

[Install]
WantedBy=multi-user.target
7. Save the file
Press the Esc key to exit insert mode, and type :wq! to save your changes and quit Vim.
8. Reload systemd process
sudo systemctl daemon-reload
9. Start the node_exporter
sudo systemctl start node_exporter
10. Check node_exporter status
sudo systemctl status node_exporter
11. Press Q to exit the status command
12. Enable Node Exporter on instance boot
sudo systemctl enable node_exporter
13. Repeat the Install Node Exporter and Configure Exporter steps on the other available instances that you want to monitor
Or you can also snapshot this current instance and deploy it multiple times.
Install Prometheus
This part will happen on a different machine/instance.
Make sure to open port 9090 to make Prometheus accessible from outside, in this case for Grafana to use it.
1. Connect to your Lightsail instance using SSH

2. Create an account named prometheus for Prometheus
sudo useradd --no-create-home --shell /bin/false prometheus
3. Create local system directories
sudo mkdir /etc/prometheus /var/lib/prometheus
sudo chown prometheus:prometheus /etc/prometheus
sudo chown prometheus:prometheus /var/lib/prometheus
4. Download Prometheus binary package
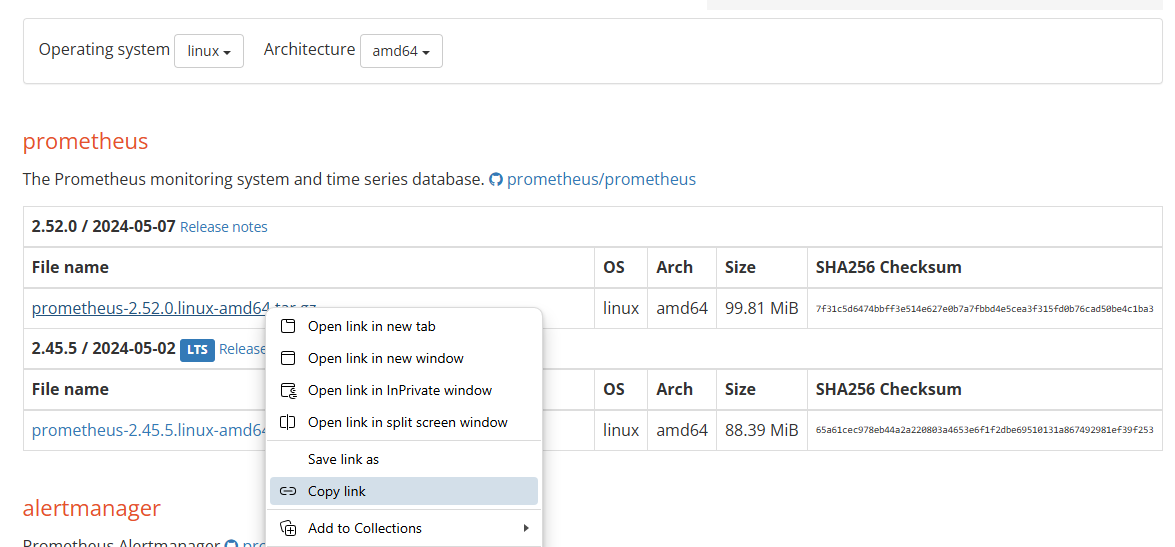
- Go to Prometheus download page
Select the operating system to be linux and architecture amd64.
The right click on prometheus latest version, “Copy link” and save it in the notepad for later.
5. Connect via SSH to your Lightsail instance again
6. Go to home
cd ~
7. Download the prometheus binary package to your instance
curl -LO prometheus_url_address_you_saved_in_notepad
Example:
curl -LO https://github.com/prometheus/prometheus/releases/download/v2.52.0/prometheus-2.52.0.linux-amd64.tar.gz
8. Extract the contents for the downloaded packages for Prometheus
Make sure the archive names match the ones in the links you copied in step 4.
tar -xvf prometheus-2.52.0.linux-amd64.tar.gz
9. Copy the extracted prometheus and promtool to the /usr/local/bin directory
sudo cp -p ./prometheus-2.52.0.linux-amd64/prometheus /usr/local/bin
sudo cp -p ./prometheus-2.52.0.linux-amd64/promtool /usr/local/bin
10. Change ownership of prometheus and promtool folders to the prometheus user we created at the start
sudo chown prometheus:prometheus /usr/local/bin/prom*
11. Copy the consoles and console_libraries to /etc/prometheus. Make it recursive copy of all directories within the hierarchy using -r
sudo cp -r ./prometheus-2.52.0.linux-amd64/consoles /etc/prometheus
sudo cp -r ./prometheus-2.52.0.linux-amd64/console_libraries /etc/prometheus
12. Change ownership of the copied folders to prometheus user
sudo chown -R prometheus:prometheus /etc/prometheus/consoles
sudo chown -R prometheus:prometheus /etc/prometheus/console_libraries
13. Copy the configuration file prometheus.yml to /etc/prometheus and change ownership to prometheus user
sudo cp -p ./prometheus-2.52.0.linux-amd64/prometheus.yml /etc/prometheus
sudo chown prometheus:prometheus /etc/prometheus/prometheus.yml
Configure Prometheus
1. Connect via SSH to your Lightsail instance again
2. Create a backup copy to your prometheus.yml config file
sudo cp /etc/prometheus/prometheus.yml /etc/prometheus/prometheus.yml.backup
3. Open the prometheus.yml config file in Vim
sudo vim /etc/prometheus/prometheus.yml
4. Edit the prometheus.yml
- scrape_inteval – this defines how often Prometheus will scrape/collect data from the targets available
- job_name – This is used to identify the exporters available for Prometheus
- targets – These will point to the actual machines from where you’re going to scrape data. They are written in the format IP:PORT.
We’re going to edit the default prometheus.yml file by:
- Setting the correct static IP on the prometheus job_name
- Adding a basic_auth for the prometheus
- Creating a job_name for node_exporter that we’re going to name node_lightsail_targets
- Group all the Lightsail instances under the job node_lightsail_targets
- Adding a basic_auth for node
# my global config
global:
  scrape_interval: 15s # Set the scrape interval to every 15 seconds. Default is every 1 minute.
  evaluation_interval: 15s # Evaluate rules every 15 seconds. The default is every 1 minute.
  # scrape_timeout is set to the global default (10s).

# Alertmanager configuration
alerting:
  alertmanagers:
    - static_configs:
       - targets:
         # - alertmanager:9093

# Load rules once and periodically evaluate them according to the global 'evaluation_interval'.
rule_files:
  # - "first_rules.yml"
  # - "second_rules.yml"

# A scrape configuration containing exactly one endpoint to scrape:
# Here it's Prometheus itself.
scrape_configs:
  # The job name is added as a label `job=<job_name>` to any timeseries scraped from this config.
  - job_name: "prometheus"

    # metrics_path defaults to '/metrics'
    # scheme defaults to 'http'.

    static_configs:
      - targets: ["your_prometheus_static_ip:9090"]

     basic_auth:
       username: prometheus_uberadmin
       password: password123

  - job_name: "node_lightsail_targets"

    static_configs:
      - targets: ["your_lightsail_static_IP:9100","your_lightsail_static_IP:9100","your_lightsail_static_IP:9100"]

    basic_auth:
      username: node_exporter_uberadmin
      password: password123
5. Save the file
Press the Esc key to exit insert mode, and type :wq! to save your changes and quit Vim.
6. Create a file that will hold the basic_auth for Prometheus
sudo vim /etc/prometheus/web.yml
Add the following text to the file and save it.
basic_auth_users:
  prometheus_uberadmin: $2a$12$GxinAvcHwkGQclBiJmz6ce5is67Bxj7mvnKyY4L0DxJooqFgA7hvu
Note: the password needs to be generated using a bcrypt hash of the string you want to use.
Use an online bcrypt tool for that if it’s easier.
The example above is the hash for password123.
7. Save the file
Press the Esc key to exit insert mode, and type :wq! to save your changes and quit Vim.
8. Start Prometheus
sudo -u prometheus /usr/local/bin/prometheus --config.file /etc/prometheus/prometheus.yml --storage.tsdb.path /var/lib/prometheus --web.console.templates=/etc/prometheus/consoles --web.console.libraries=/etc/prometheus/console_libraries
9. After the running service is validated, press Ctrl+C to stop it.
10. Open systemd configuration file in Vim
sudo vim /etc/systemd/system/prometheus.service
11. Insert the following lines into the file
[Unit]
Description=PromServer
Wants=network-online.target
After=network-online.target

[Service]
User=prometheus
Group=prometheus
Type=simple
ExecStart=/usr/local/bin/prometheus \
--config.file /etc/prometheus/prometheus.yml \
--storage.tsdb.path /var/lib/prometheus/ \
--web.config.file /etc/prometheus/web.yml \
--web.console.templates=/etc/prometheus/consoles \
--web.console.libraries=/etc/prometheus/console_libraries

[Install]
WantedBy=multi-user.target
The instructions above are going to be used by Linux to start Prometheus on the server.
12. Press the Esc key to exit insert mode, and type :wq! to save your changes and quit Vim.
13. Load the new information into the systemd
sudo systemctl daemon-reload
14. Restart Prometheus
sudo systemctl start prometheus
15. Check Prometheus status
sudo systemctl status prometheus

16. Press Q to exit the status
17. Enable Prometheus on instance boot
sudo systemctl enable prometheus
18. Check Prometheus in the browser
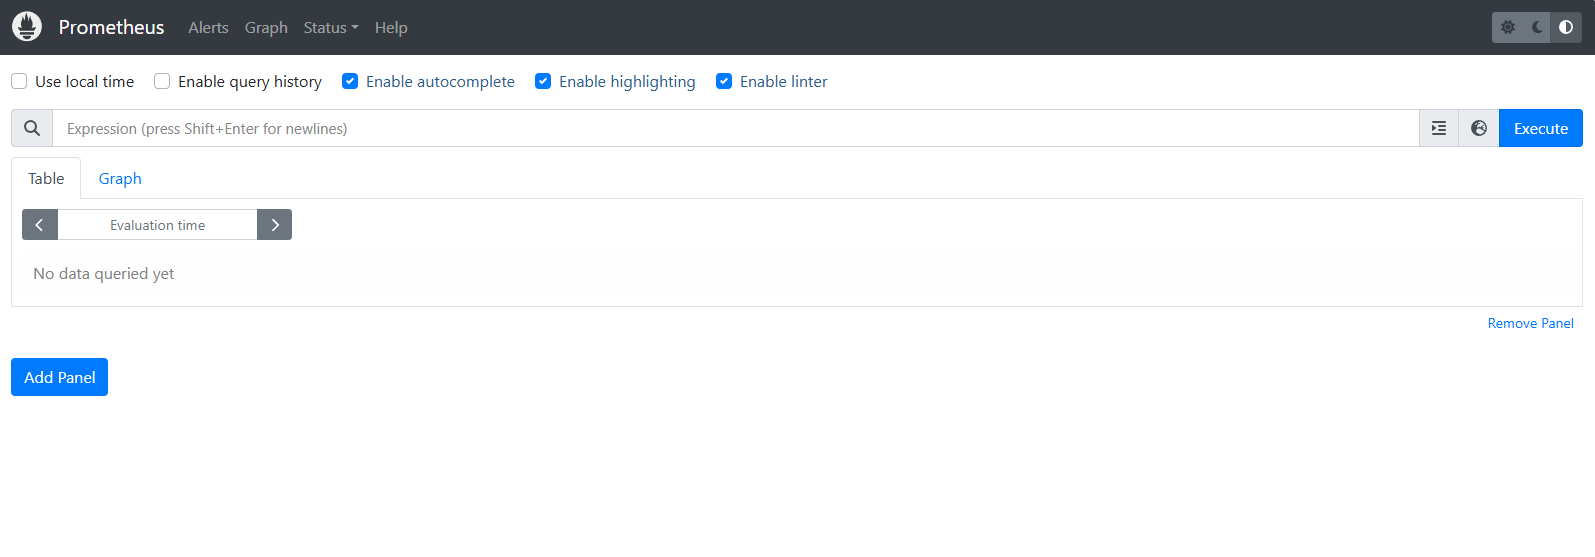
Go to HTTP://your_prometheus_static_ip:9090
You will be prompted to add a username and password. Use the ones you set in the basic_auth.
After you will be redirected to the Prometheus dashboard.
19. Check the targets
Go to Status > Targets
In there, you should now see the node job listed.

Configure Grafana
I assume you already have Grafana installed. In this tutorial, we’re skipping the part about installing Grafana.
You can check the Resources at the bottom where we have some links on how to install Grafana.
I recommend having Grafana on a different machine since you will use it in the future to monitor different servers probably.
1. Add Data source
Go to Data sources > Add new data source
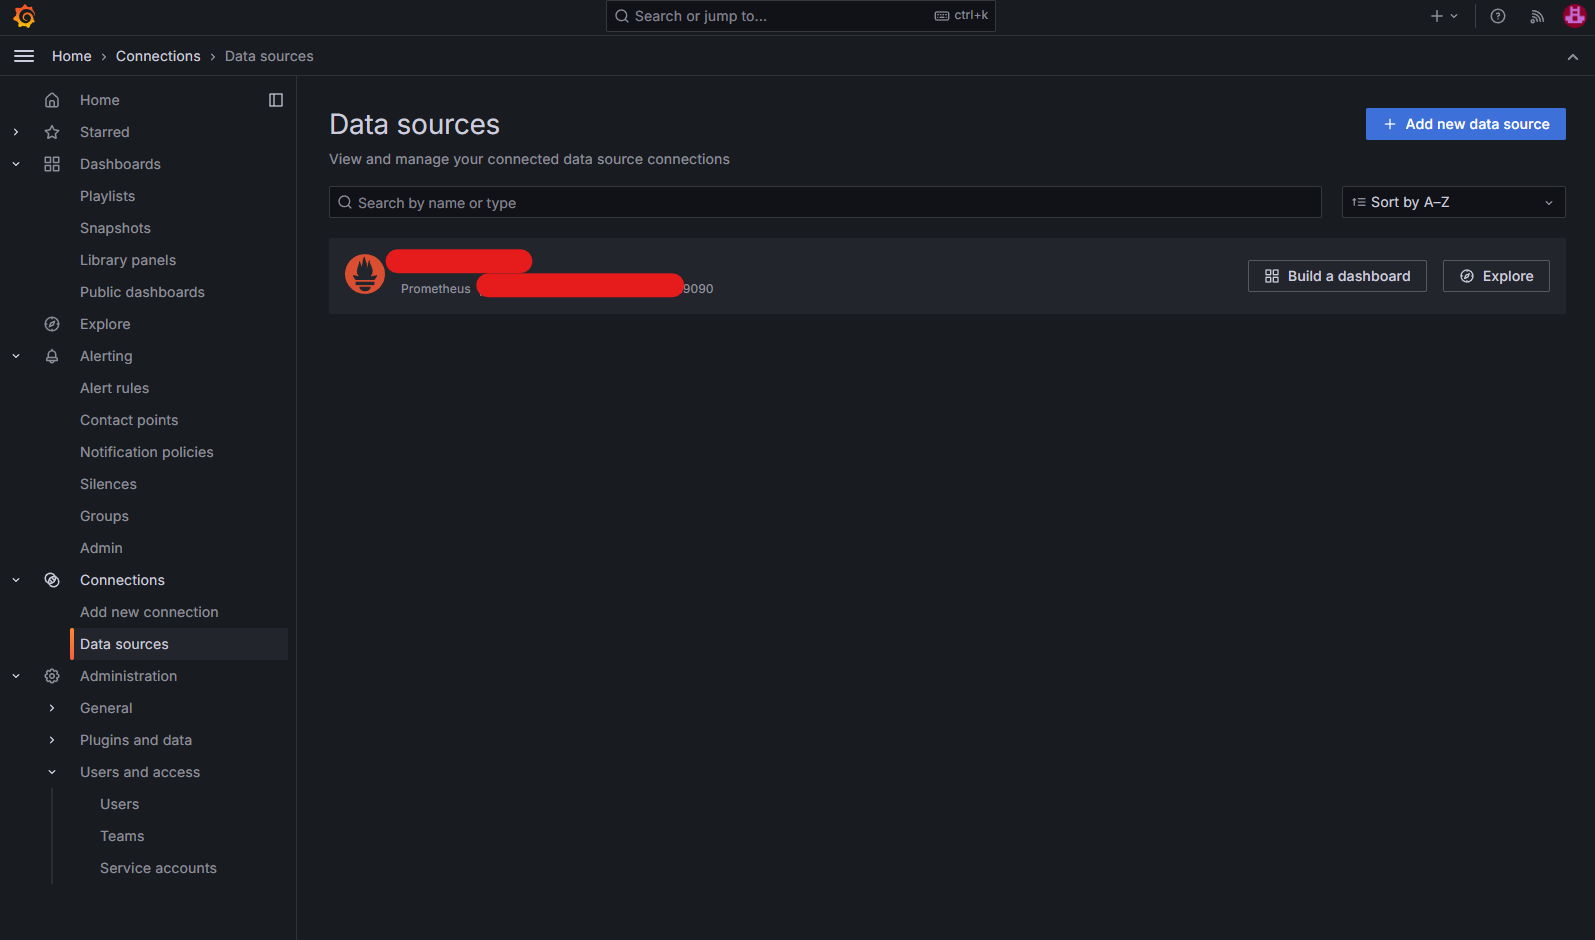
2. Select a Prometheus data source

3. Add URL and credentials
Complete the Prometheus server URL with the HTTP://static_ip:9090
And on Authentication select Basic Authentication and add the credentials we created. In our case prometheus_uberadmin and password123.
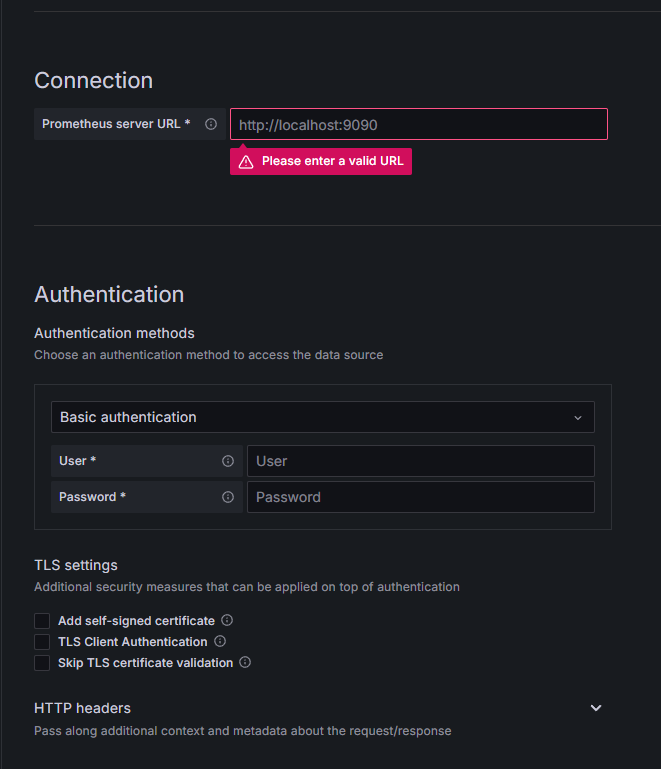
Scroll down and click Save & Test.
4. Create a Dashboard
Go to Dashboards > New > New Dashboard
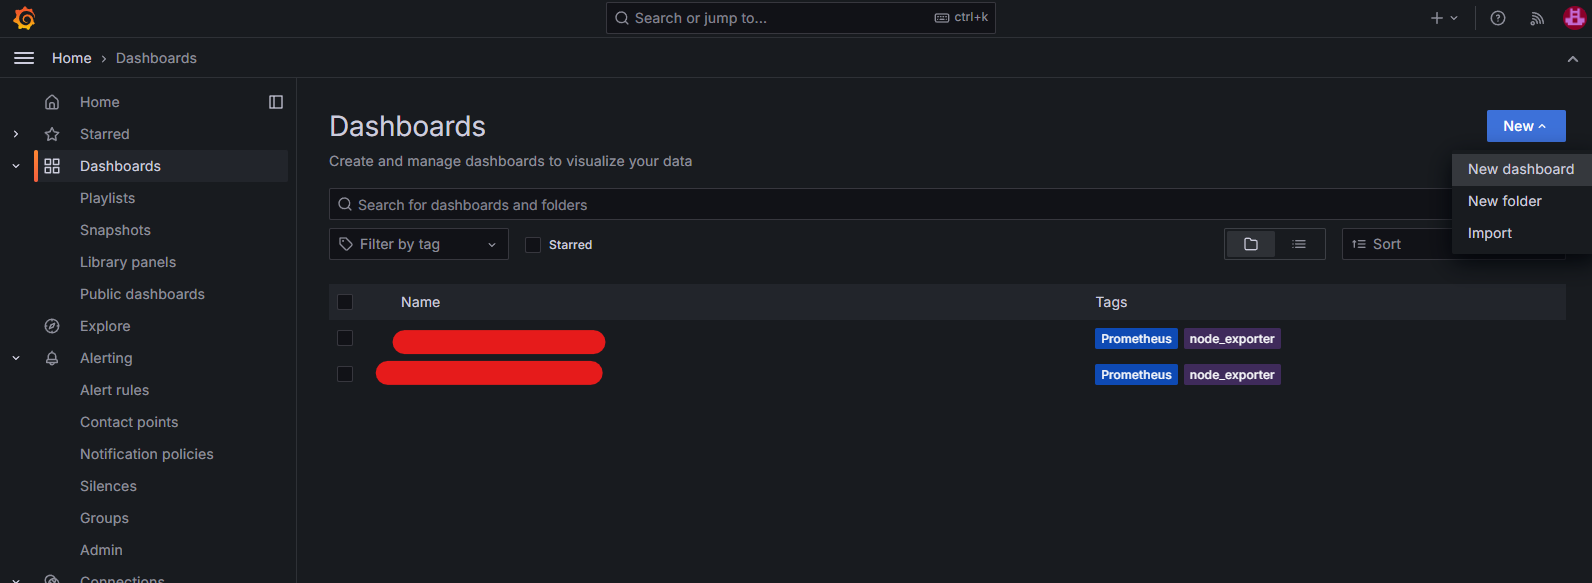
4. Click on Import a dashboard
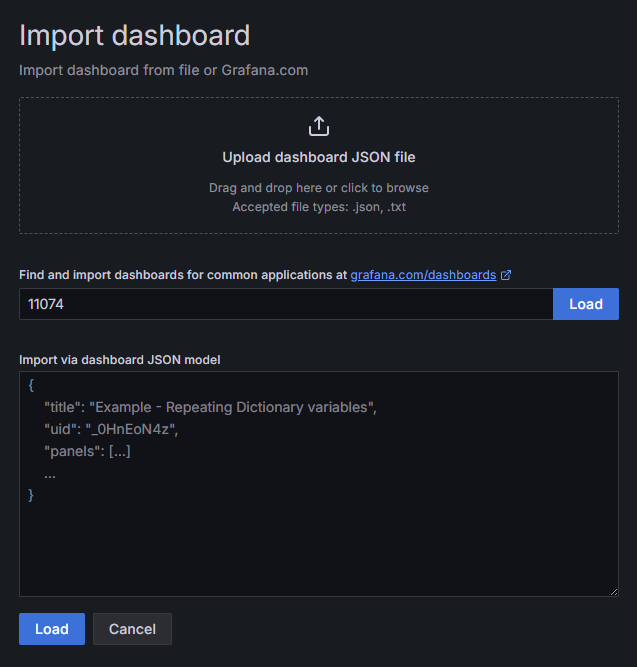
You can go to this page and find a dashboard that matches your needs https://grafana.com/grafana/dashboards
I recommend one of these 2 to get a good overview of your instance in Grafana:
Paste the ID of the dashboard in the import section and load it.
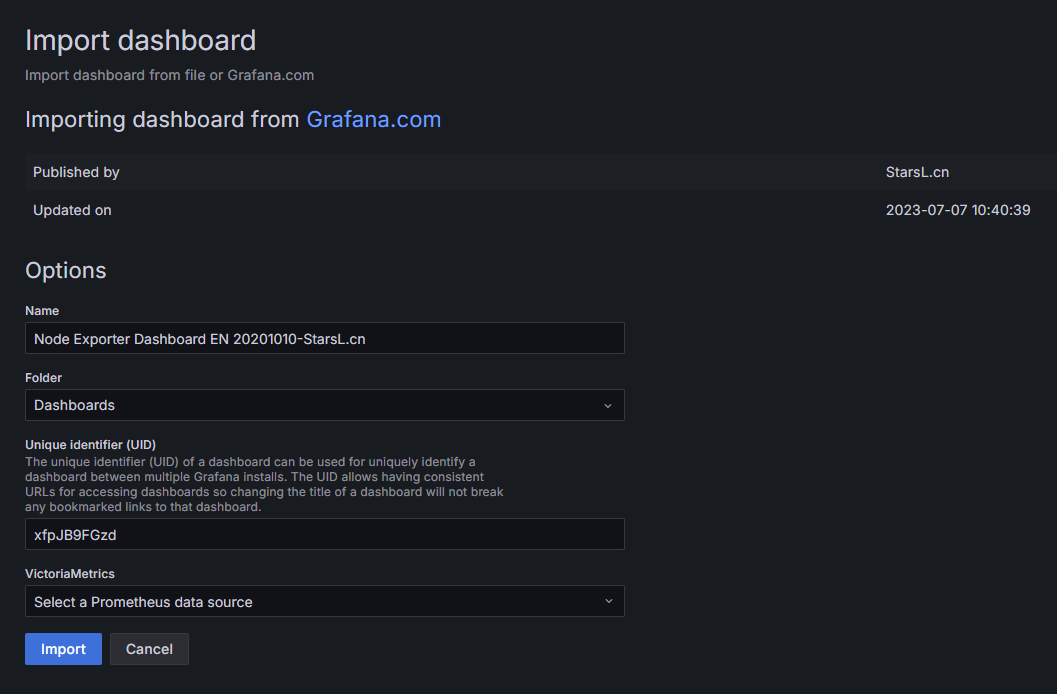
5. Select the Data source
Add a name for the Dashboard and select the Prometheus data source we created in step 3.
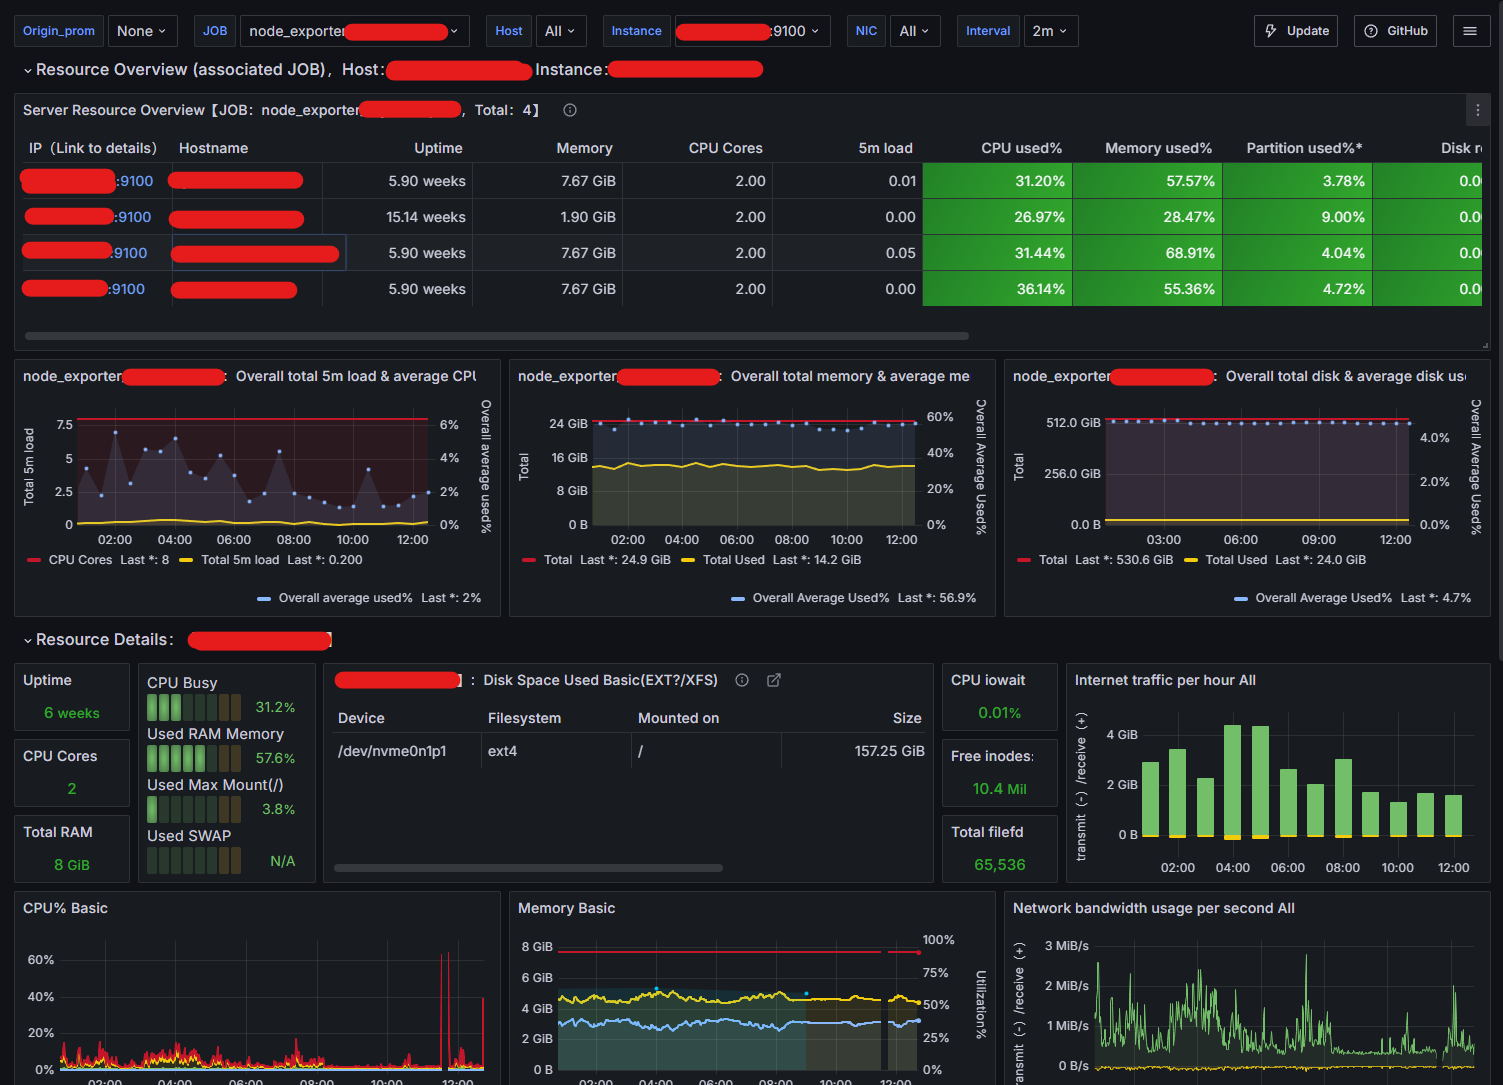
Once you click Import a new dashboard will be generated with the details pulled from Prometheus.
Conclusion
Following these steps will allow you to monitor multiple Lightsail instances into a single Grafana dashboard using Node Exporter and Prometheus.
This is a very useful setup for an application running on multiple Lightsail instances behind a load balancer.
You can check Grafana’s documentation on how you can do more, or tweak the existing dashboard.
Resources
The starting point for this article was the tutorial provided by AWS on how to get started with Prometheus on Lightsail.
